


Lash Mapping For Doll Eye Lashes!
Scrolling through Instagram, you'll see a new lash map every other week. But there are a few styles which have stood the test of time, due to how easy they are to learn, and how much they flatter so many of our clients! We'd like to introduce you to one of our favourite lash maps ever - we're sure you've heard of her - the Dolly.
A Dolly style is achieved by putting the longest extension in the middle of the eye - sounds simple, right? Not so fast! There are a few really important steps which have to be followed, otherwise you may end up with either a totally different style or with uneven eyes, which isn't something we'd typically aim for!
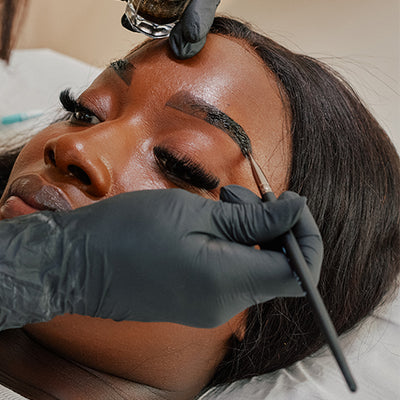
Lash mapping is essential - before you get to work on the lashes, you have to make sure you have drawn your lash map correctly on the eye patches.
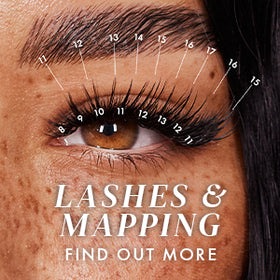
1. Start by finding the middle of the eye - when the client's eyes are closed, pay attention to where the iris sits. You'll be able to see it move under the eyelid, you may need to get them to move it around a bit to see where it rests. Draw a dotted line on the eye patch from this point outwards.
2. Make similar dotted lines out from the first lash and from the last lash. Between these lines is where your lash map will be drawn.
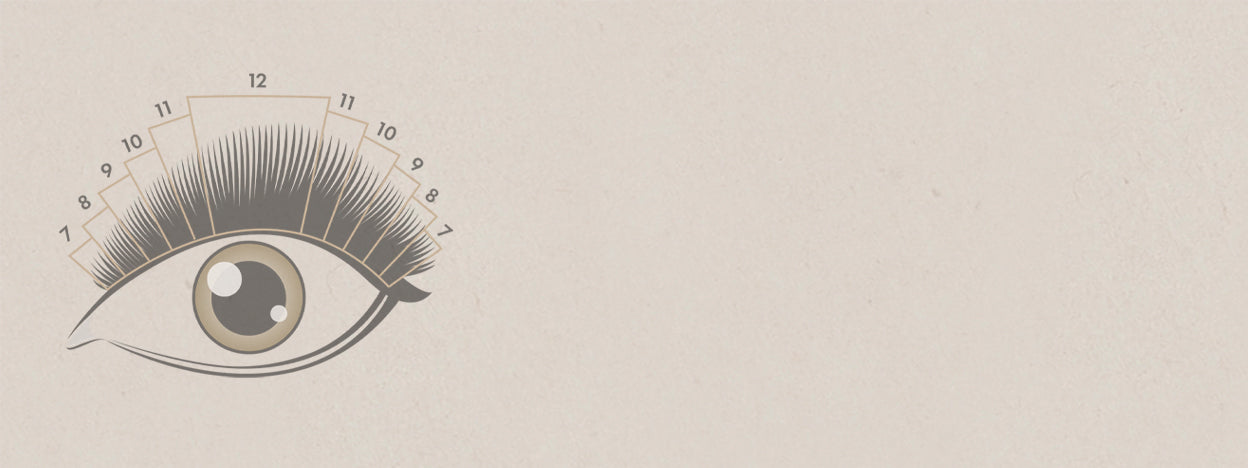
3. Now, you're going to draw two lines at equal distance either side of your centre line - this is where your longest lashes will go. From this length, drop down 1mm in stages until the inner and outer line that you drew. You'll end up with something like this:

It's up to you how many lengths are used and which lengths you use - if your client wants a very natural, understated look then going from 7mm-10mm will be perfectly fine. If they want something a bit more dramatic, then you can aim for 7-12 as shown above.
TOP TIP! It's important that any lash map has short lashes in the inner and outer corners in order to protect the lashes there - starting and finishing your lash map with 7mm or less will help keep your set looking fresher for longer as lashes won't be weighed down as they grow out. You're also preventing the lashes from twisting as they grow, and from potential damage!
Now, complete your pretreatment, and you're ready to go!
By following these few simple steps you will make sure your dolly sets will always look even, neat and you will avoid common styling mistakes of unsymmetrical eyes!
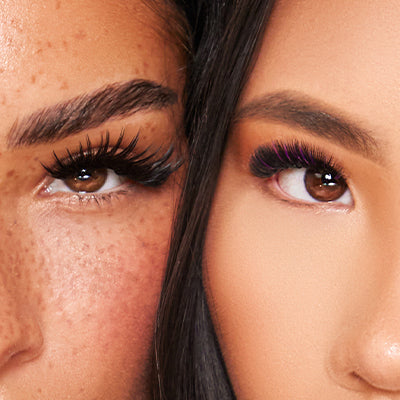
Wait! Who do Dolly lashes suit best? Dolly lash mapping is ideal for clients with smaller eyes as it will open them up nicely, making them look bigger. If a client has a wider set of eyes a Dolly lash map will also be perfect as it will create the illusion of the eyes being brought closer together.

Dolly set by LLP Trainer in Denmark @victoria.andres.londonlashpro
Please remember to tag us if you post any dolly sets! We love seeing your progress.