


Our Top 5 Lash Hacks To Save You Time And Money!
As a Lash Tech, it’s important for you to continue to learn and improve your skills with training for new techniques, and to help you keep up with newly emerging lash trends. So, it’s only natural that you should also learn what practices you can implement into your business and treatments that will help you to save both your time and your money. To help with this, we’ve compiled a list of our top 5 lash extension hacks that can help you to make your work more efficient, whilst also providing the best possible treatments for your clients!

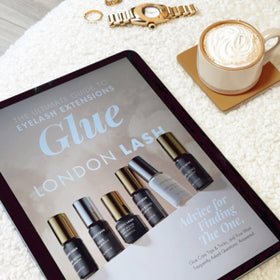
Are You Storing Your Eyelash Extension Glue Correctly?
One of the most important factors that will have a big impact on the quality of your eyelash glue, is the way you store it. Storing your lash glue incorrectly can be detrimental not only for the appearance of the lashes you have just spent so much time creating, but can also result in poor retention of those eyelash extensions afterwards.
Before an eyelash extension glue is opened, it will have a shelf life of up to 6 months from the date at the bottom of the bottle, and can actually be stored in a fridge ready for when you need it. However, once you have opened your eyelash glue, it will only have a shelf life of up to 2 months, and absolutely cannot be stored in a fridge after this. We would recommend that you store your open lash glues in an airtight container that is kept in a cool and dry place, such as a cupboard that is positioned away from any windows and heat sources like a radiator. If you were to store your eyelash glue in a fridge after you’ve opened it, the cold temperature would cause shock polymerisation and cure your lash glue whilst it’s still in the bottle, ruining the lash glue. Although we have mentioned that your eyelash extension glue can have a shelf life of up to 2 months once opened, to achieve the best results and great retention, we actually recommend that you change your lash glue at least every 4 weeks. This will help to ensure you’re working with fresh glue that will behave beautifully when creating gorgeous lash sets.
Another thing to consider when it comes to your lash glue storage is the temperature and humidity levels of your treatment room. Fluctuations in temperature and humidity will affect the drying speed of your glue, which will, in turn, throw off your treatment timings and can result in poor lash retention if the eyelash extensions haven’t bonded to the natural lashes properly. You can check out our blog post to find out more about how you can maintain optimal room conditions to get the most out of your lash glue!

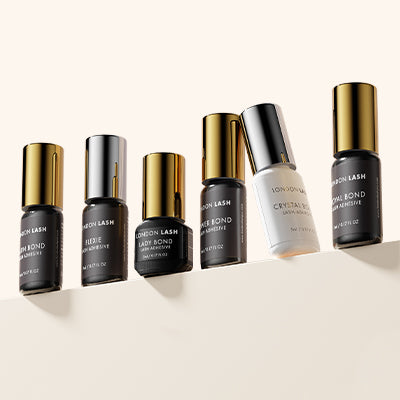
Are You Shaking Your Lash Glue Properly?
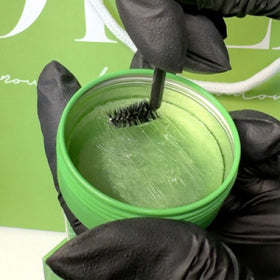
When your eyelash glue has not been used in a while, the ingredients within it tend to separate. So every time you go to use your lash glue, you’ll need to make sure you give it a good shake so the ingredients are mixed well for the adhesive to work properly, and ensure better retention for your client’s eyelash extensions. When using a lash glue with a black pigment, it’s easy to tell if the glue has been mixed correctly, because you’ll see it is a pitch-black colour when you apply your glue drop. If it hasn’t been mixed correctly, then it will have a grey and speckled appearance.
You could shake your glue by hand for at least 60 seconds, as this will be long enough for your lash glue to mix nicely. However, mixing your glue this way can lead to hand fatigue and end up clogging the glue nozzle, which creates extra work for you to also unclog it before you use it. To save your hands from getting tired and to mix your lash glue more efficiently, we recommend investing in a glue shaker. Using a glue shaker before you dispense each drop, will reduce the time needed for the perfect glue mix from 60 seconds, down to just 15! The centrifugal force of the glue shaker will force the glue to the sides and then recollect in the middle when it stops moving. This will help to keep the glue from getting into the nozzle and clogging it, which is unfortunately a common occurrence when you manually shake your lash glue.
You Need to Burp Eyelash Glue!
We know this may sound like one of the strangest pieces of advice you have heard when it comes to looking after your lash glue, but we promise this is a real hack that you need to be aware of! Similar to what you would do for a baby, burping your eyelash glue will help to remove excess air from the bottle. The presence of excess oxygen in your glue’s bottle will affect the freshness of your adhesive and decrease its shelf life resulting in you having to buy more. You can burp the lash glue by squeezing both sides of the bottle with your index finger and thumb. Any excess air that is in the bottle will push out all the glue that is sitting in the nozzle, so you can wipe the nozzle clean with a Biodegradable Glue Nozzle Wipe, and replace the cap back onto the bottle before you release your grip. Voila~! You now have a clean and healthy glue ready for use.

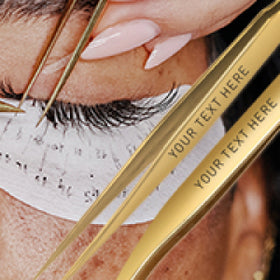
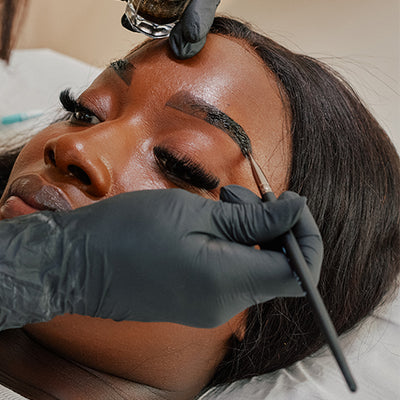
Are You Holding Your Lash Tweezers the Right Way?
Holding your lash tweezers in the correct way is essential for providing an even tension to improve your accuracy when picking up eyelash extensions, or isolating lashes. Using this method is also a great way to prevent your hand from experiencing fatigue and developing a painful condition known as carpal tunnel. In order for you to hold your lash tweezers correctly, they should always be held with three fingers. Your index and middle fingers should be on one side of the tweezers, and your thumb should be on the opposite side. For additional support, you could also place your fourth finger near the tip of your tweezers. When you are creating a fan, your thumb, index, and hand should be relaxed - the middle finger is the only one doing the actual work. The support fingers are only there to help. Pressing down with your middle finger on the tweezer will help you to manipulate it. We know that if you’re someone who holds their tweezers like a pencil, you may find holding it the correct way awkward at first, but if you keep practicing DAILY to correct it, it will become more natural and you'll end up improving your extension application speed!

Use a Wooden Spoolie for Pretreatment
If there’s one thing that we at London Lash will not compromise on, it’s the belief that pretreatment is KEY! If you want your lash retention to be top-notch, then you need to have an effective pretreatment routine. If you want to find out more about why having an amazing pretreatment routine should be an essential step in your lash extension treatment, then you should check out our blog post about it.
When you go to shampoo the lashes, place a thin, wooden spoolie underneath the lash line. This will ensure that any makeup, dirt, or residue present will not get onto the eye patch. By doing so, you won’t have to use more than one pair of eyepatches, saving you having to spend time replacing them with clean ones, and money as you eliminate having to use more eyepatches than necessary. This hack will also stop the products you will be using during the pretreatment steps from getting in your client’s eyes, and in turn, avoid any eye irritation.

So whether you're a seasoned pro or a beginner who is just starting your career in the lash industry, we hope you have found these hacks helpful and you can take your skills to the next level!