How To Make An Eyelash Extension Set PERFECT!

Crafting Perfection: Expert Advice For Flawless Eyelash Extensions
We all spend a fair amount of time each day scrolling through social media and staring longingly at those lash sets we aspire to create later in our lash career. We all want our work to be ‘perfect’, but what actually constitutes a technically perfect lash set?
As the first company in the UK to organise and host an eyelash extensions championship (Lash Battle), and being one of the leading training academies in the UK, we’re pretty well-versed in the intricacies of what makes a technically flawless lash set!
So, what are judges and lash trainers assessing when they look at your lash set?
The Aesthetics Of A Lash Set
Top Line
The top line is exactly what it sounds like - it’s the line formed by the top of the eyelash extensions. Lash styles like Kim K Lashes with their super wispy top line, or Wet Look Lashes with their much more spiky finish are super popular at the moment, but when Russian Volume Lashes first came onto the scene one of their key characteristics was that they had a super even top line.
When we assess this, we’re making sure there’s no lash out of place!
Some competitions now have a Kim K Lashes styling category - for this, they’re looking for an even top line with clear lash spikes.

Direction Of The Lash Extensions
Next, we’re looking at the direction of your lash extensions. If they’re leaning to the side then points will be taken off!
Now, if you’re working on Extreme Cat Eye Lashes or Fox Style Lashes, then you may well have the lash extensions gently sweeping outwards towards the outer corners of the eyes - this is perfectly fine as it adds to the overall look. So, as long as all the lashes are pointing in the direction that they’re supposed to, you’re onto a winner!
Styling
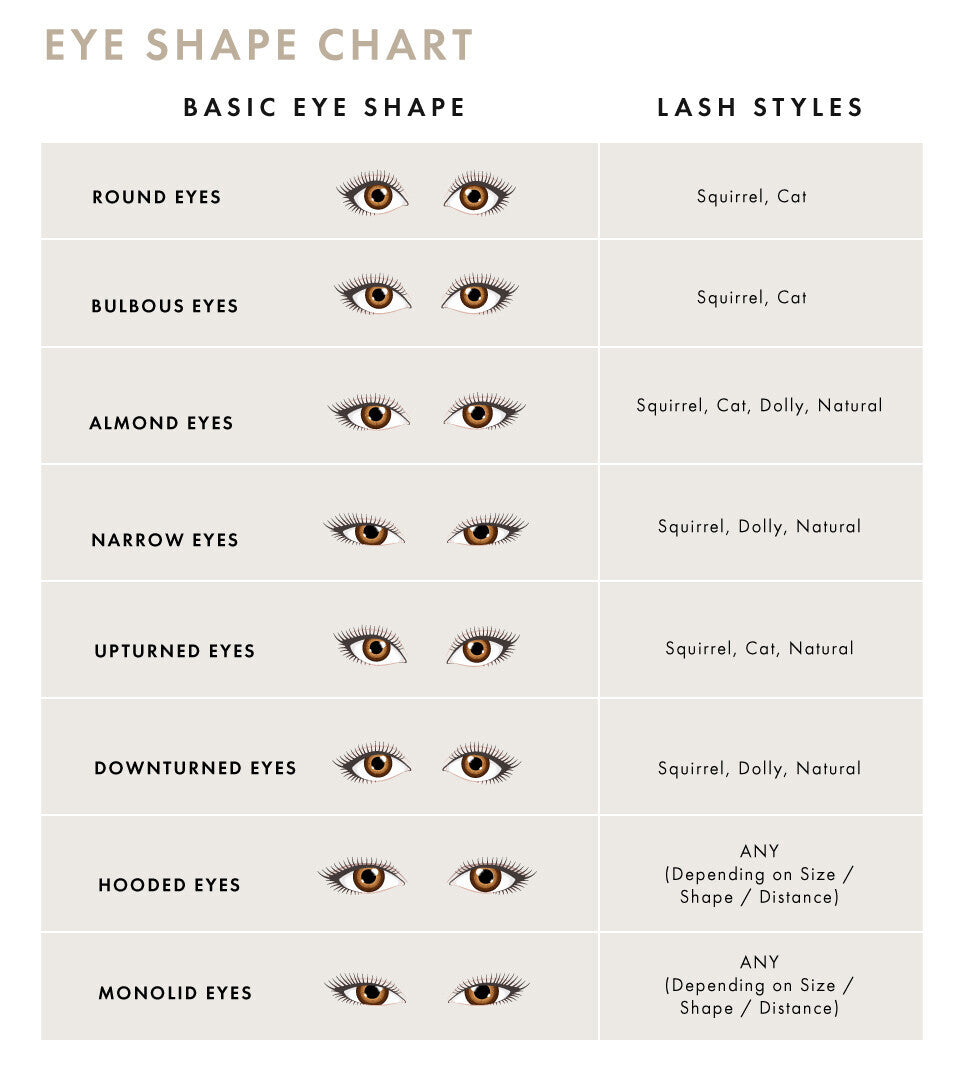
Did you choose the right lash mapping style for your client or model according to their eye shape, face shape, and bone structure? Did you consider the size of their eyes and the distance between them? If not, points will be docked.
Remember that eyelash extensions are an enhancement of our clients’ natural gorgeousness, so we’re always looking to compliment them - it’s why different lash styles exist in the first place!
As a general rule of thumb:
Wide-set Eyes = Doll Eye Lashes
Proportional = Squirrel Style Lashes
Close-set Eyes = Cat Eye Lashes
One of our favourite mottos is - if in doubt, Squirrel. Squirrel Style Lashes follow the lengths of the natural lashes, and has the longest section of lashes positioned under the brow arch, making it very flattering on pretty much everyone.
There are a lot more factors that go into lash styling, so this is a very basic guide but as long as you take your client's/model’s natural features into consideration when picking a lash mapping style for them, you’ll be fine!
Coverage
You should be aiming for at least 80% coverage - if it’s a competition lash set then aim for 100% (excluding those tiny baby lashes). Of course, this is easier said than done with in-person competitions - online competitions are a blessing in this regard as you can take a full day if you need to, you’ll just need to bribe your lash model with an extra big present - so to help achieve this it’s best to work with the lashes in layers.
Overall Look
Pretty simple one - does it look good? Is a judge or mentor looking at this set and going ‘oooh I want that!’ or are they thinking ‘hmm, something’s not quite right here.’ This can come down to the lengths of the eyelash extensions used, it can be due to gaps/leaning lash fans, it could even be that the lash mapping style used isn’t quite right for your model's features.
This also comes down to if the model has very bloodshot eyes, so be mindful that their eyes are closed during their lash treatment, and at least use a fan at the end to waft away any lash glue fumes so that you can avoid chemical burn!
Symmetry
Is the lash set the same across both eyes? Have you got your length graduations in the same spots on both sides? One thing that will help you out massively with this is simply drawing a lash map on your under eye patches, so we ALWAYS recommend this, regardless of if you’re about to do your first set of lash extensions or your thousandth.
Sometimes a lash map isn’t quite enough to achieve perfect symmetry - sometimes your client will have two different shaped/sized eyes, or their natural lashes will grow downwards on one eye and upwards on the other. Those clients are trickier but not impossible! It just means that you’ll need to be a little bit more creative with your curls/lengths/lash mapping. A tighter curl such as a CC-curl on straight lashes compared to a C-curl on lashes growing upwards will help you out in this regard. It takes some practice but you’ll get there!
That being said, if you are working towards an assessment or a competition, choose your friend with the easiest lashes to work with!

The Technicalities Of A Perfect Lash Set
Stickies
Even if there’s only one stickie in the whole set of eyelash extensions, we absolutely cannot let it slide! They’re so damaging to your clients’ natural lashes, to your reputation, and actually to the lash industry as a whole. All those questions about whether eyelash extensions cause damage come directly from stickies having been so prevalent when lash extensions were new, and isolation wasn’t the best. Now we know how to isolate individual lashes perfectly, how to correctly dip our eyelash extensions into our lash glue and proper attachment methods. We have no excuse!

Attachment
How well are your eyelash extensions attached - another simple one! Put simply, your eyelash extension should be flush with the natural lash it’s attached to - there should be no criss-crossing, no lifted bases - nothing that can cause discomfort or stickies, essentially.
Clean Work
This one really amounts to ‘how much lash glue has been used’. We don’t want to see big clumps of eyelash glue in the lash line - apart from being pretty ugly, it’s going to lead to stickies, which we obviously want to avoid!
You’ll also want to make sure there isn’t any shock polymerisation in your set for this part, as this will also deduct points.

Length
Why isn’t lash length included in the aesthetics section? For the simple reason that lash extensions that are too long can result in damage. As a general rule, the longest eyelash extensions you should be using is 3mm longer than the natural lash.
So what about lash spikes? In a set of Kim K Lashes, you’ll be adding spikes throughout the lash set which are more than likely going to be 5-6 mm longer than the natural lash length. How do we protect those lashes then? With spikes, you’ll either be using closed lash fans, Flat Lashes, or Premade Lash Spikes. If you’re using closed lash fans, opt for thinner lashes - Flat Lashes are MUCH lighter than standard Classic Lashes so a 0.25 Flat Lash is fine for a lash spike - it weighs about the same as a 0.15 Classic Lash.
Thickness/Weight
Pretty much the same as above - are the lashes you’ve chosen safe for the lash set you’ve done? If you’re using 0.10 for a 4D set you’re going to have points deducted - it’s simply not safe for anyone’s natural lashes!
With competitions, you’ll be in a category so you won’t really go wrong with fan sizes there (unless you specifically do 5D in a 2D category, but that’s just an error and not an oversight), but when you submit work for an eyelash extension course, it’s usually better to send 3D-4D lash sets at most, so that they can really see the attachment skill at play.
If you’re in a Mega Volume Lashes category and they find anything thicker than a 0.05, points are being deducted. We all have those clients who want thick, dark, full sets and we can provide this for them safely with those super fine lashes created just for Mega Volume Lashes. 15D lash fans in 0.03 aren’t going to cause damage.

Distance From The Eyelids
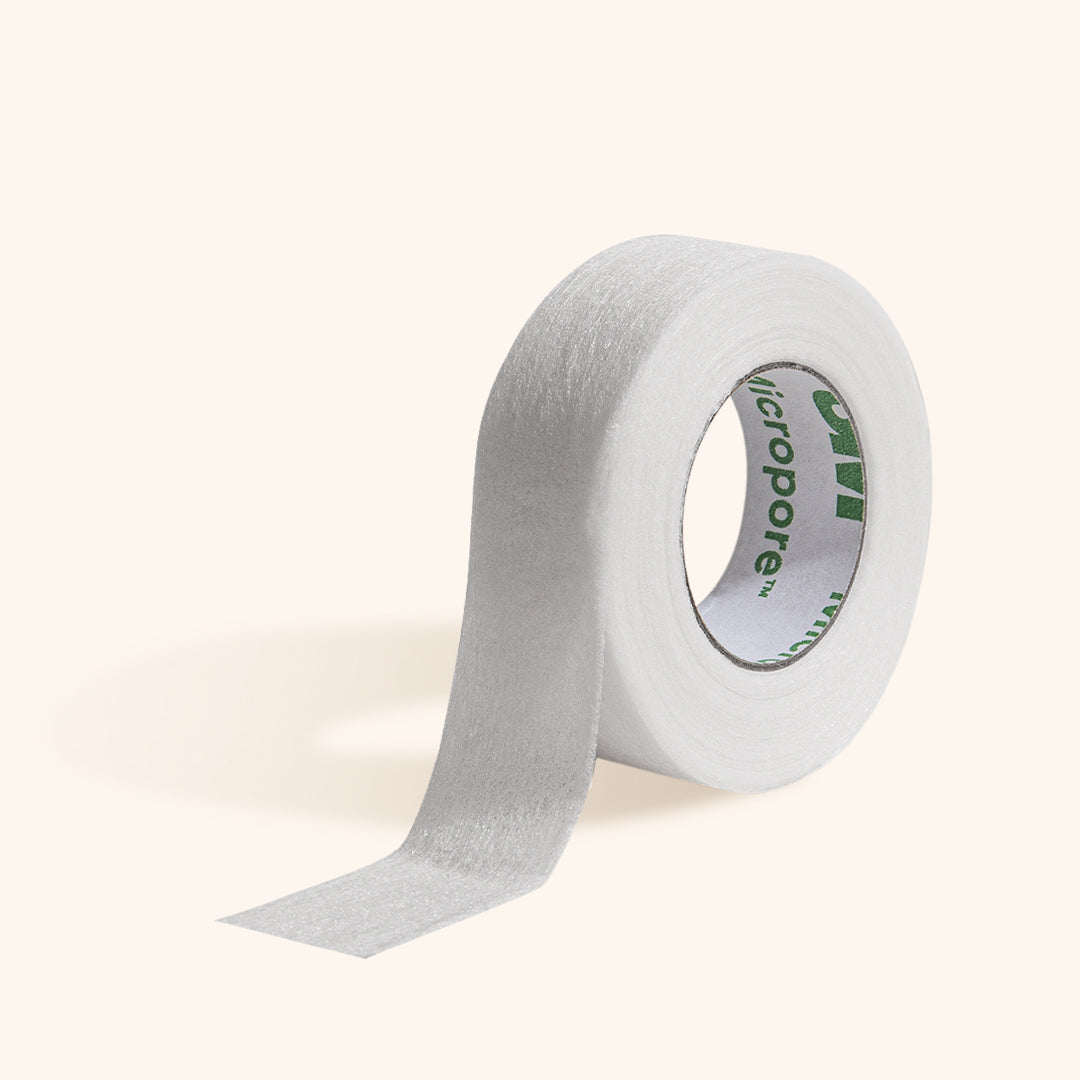
Your attachment should Ideally be 0.5mm from the eyelids in the inner and outer corners, and 1mm through the rest of the lash line. This is tricky when you first start, but it will absolutely come with practice. Using eyelid tape to gently lift the eyelids will help you to access these natural lashes more easily, so try this if you tend to have lash extensions very far away from the eyelids.
Similarly, if your eyelash extensions are placed too close to the eyelids, the judges are going to have to say something! Eyelash extension glue shouldn’t ever touch the skin - it increases the risk of an allergic reaction and is generally uncomfortable.
Fluffiness Of The Lash Fan
This is not to say that they’ll be harsh if you’ve opted for narrow lash fans or wide lash fans - they each have a long list of merits when used correctly! What they’re looking at here is the distance between each eyelash extension in the fan and ensuring that the fans themselves are lovely and even. The more even your lash fans are, the fuller your lash set will look.
Inner And Outer Corners
All of the inner and outer corners of the eyes should be covered with lash extensions, and should have those lash extensions applied at the correct distance. We’d recommend two things here to help you with this:
1. Using eyelid tape to gently lift the eyelids to help you access these lashes.
2. Applying the outer corner lashes first. One of the most common reasons for points to be deducted is shock polymerisation, and one of the most common causes for shock polymerisation is due to a client’s eyes watering towards the end of the lash set. By applying your lash extensions there first, you’re giving the eyelash glue more of a chance to dry if those lashes do start to leak, which also gives you a better chance of avoiding shock polymerisation!
Crafting the perfect set of eyelash extensions is a blend of skill, artistry, and understanding your client's needs. By following these tips and techniques, you'll be well on your way to creating stunning lash looks that leave your clients feeling amazing. Keep honing your craft, stay passionate, and watch as your lash game reaches new heights!